With the removing of the Nest Thermostat integration in Olisto I was missing an essential input for the in house temperature for a couple of my Trigs that control the sunscreens based on weather forecast connected to KlikAanKlikUit(KAKU).
While I have HomeAssistant for my energy monitoring, I integrated the Nest Thermostat there. But my HomeAssistant setup is not stable enough to replace my KAKU and Olisto.
With the idea for each use case there is a solution I would like to share how I bring the Nest temperature and humidity values to Olisto from Home Assistant.
- Create an Olisto Connect for temperature and one for Humidity.
the URL you get in the email would look like this:
base: https://connect.olisto.com/c/yDm4on9K0VkZq0NGyrhZ
the last part after the ‘/’ is a unique key. The unique key above is an example value.
You can expand this url with a value, which looks like this:
https://connect.olisto.com/c/yDm4on9K0VkZq0NGyrhZ?value=100
When you put this url in the browser, you will see in Olisto that your temperature or humidity Olisto Connect channel got the value of 100.
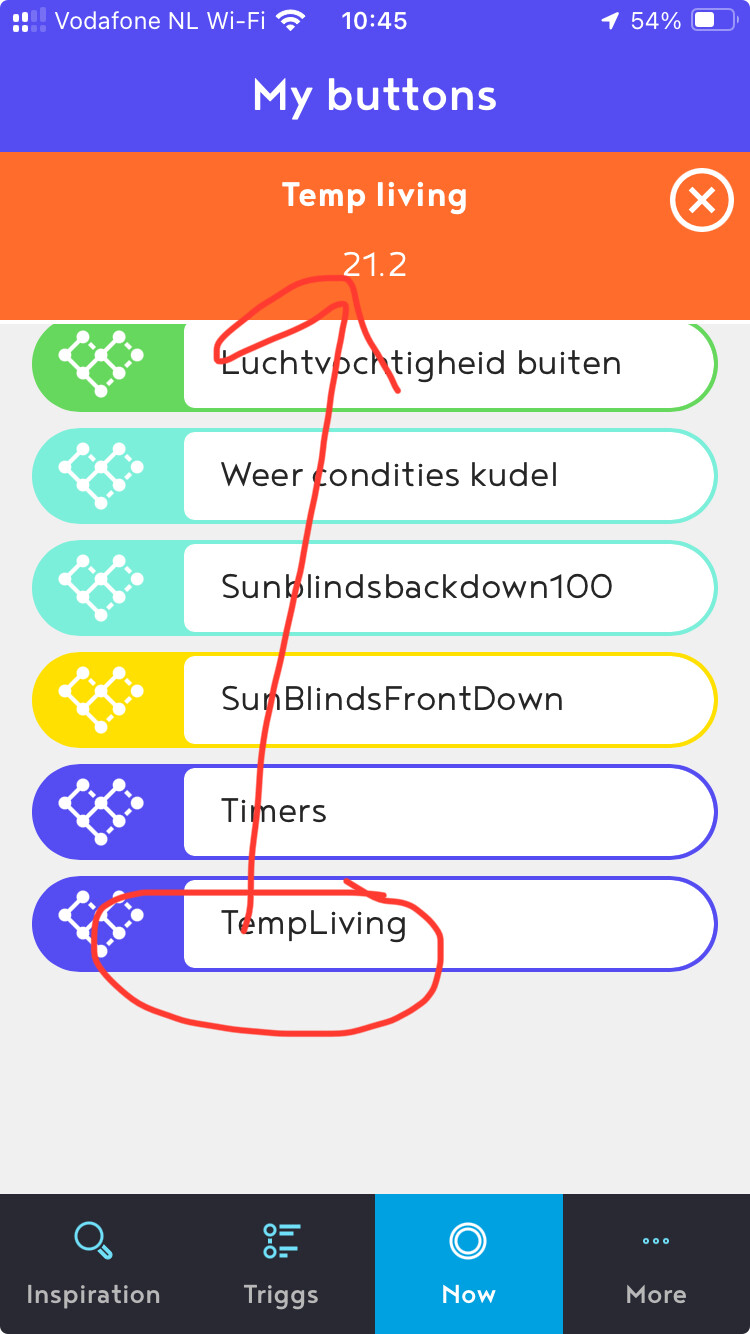
You can test this by creating a Now trig with a notification with this Olisto Connect channel. See screenshot below.
To get the values automatically updated from Home Assistant to Olisto, you have to add some Rest config to your configuration.yaml and create an automation. See following steps.
- Add the following lines(starting with ‘#’) to your configuration.yaml. Under Developers Tools > Yaml click on ‘check configuration’ to make sure you have no typo’s which will prevent you Home Assistant from restarting. Then restart Home Assistant.
(Reload of the yaml(quick restart) is not enough, so you have to do a restart.)
#rest command to send temp to olisto connect
rest_command:
temptoolisto:
url: “https://connect.olisto.com/c/yDm4on9K0VkZq0NGyrhZ”
method: post
content_type: “application/x-www-form-urlencoded”
payload: “value={{ states(‘sensor.thermostat_living_temperature’, rounded=True) }}”
The url is the same as from step 1 and in payload you have to add the sensor how it is named in your Home Assistant setup. Easy to find under Entities.
For the humidity you can add an additional part as copy of the part after ‘temptoolisto:’ with changing the url and sensor part ofcourse.
- Create a most basic automation like this(yaml view);
alias: UpdateTemp2Olisto
description: “”
triggers:
- trigger: time_pattern
minutes: /15
conditions:- condition: time
after: “05:30:00”
before: “19:30:00”
actions:- action: rest_command.temptoolisto
data: {}
mode: single
(the bullets must be dashes like ‘-’)
In this example it will update the temperature every 15minutes between 530h and 1930h. After creating and saving you can switch to UI view and make easy changes to the automation. The name ‘temptoolisto’ should correspond with the same name in step 2.
Olisto trigg for checking the value:
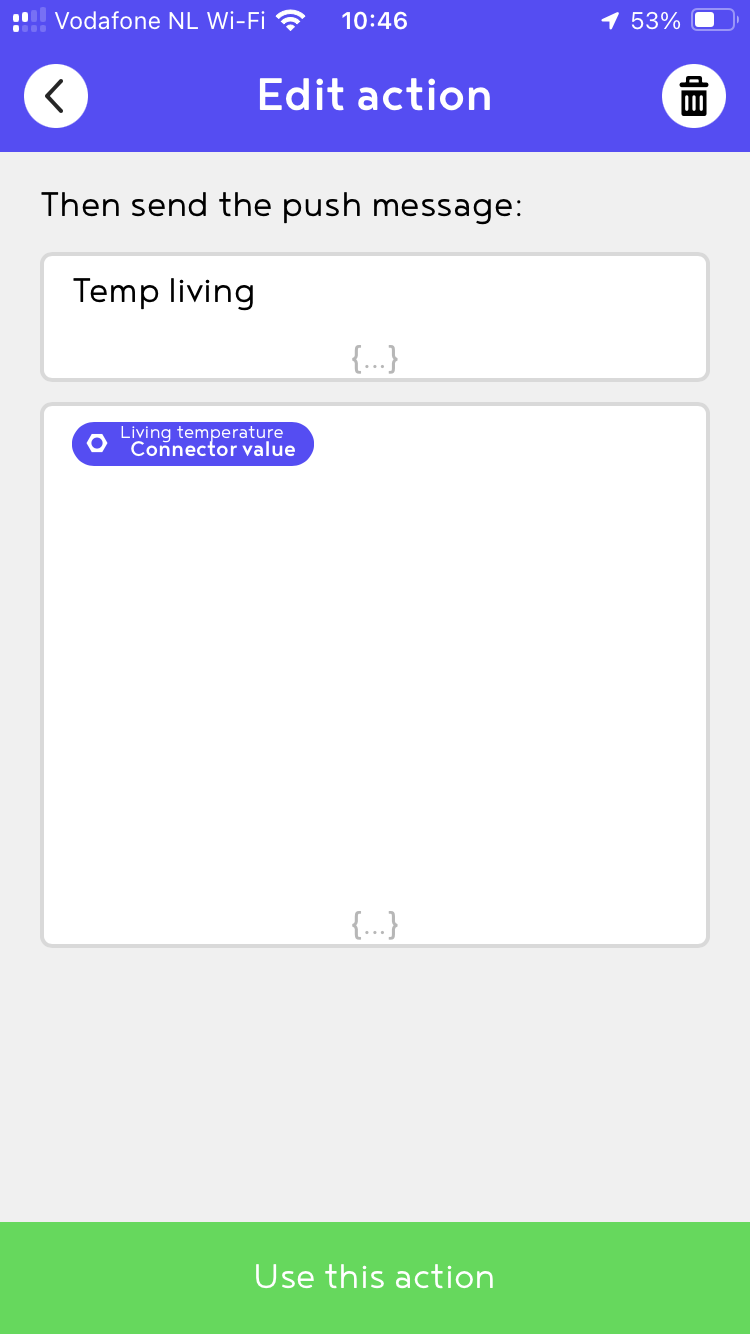
notification:
Olisto Now screenshot: